
Once the CookieYes plugin is installed and activated, follow these simple steps to connect your site to the CookieYes dashboard.
Full instructions to connect the plugin are available at https://www.cookieyes.com/documentation/install-cookieyes-wordpress-plugin/
Step 1: Open the CookieYes Dashboard
- Log in to your WordPress admin area.
- In the left sidebar, click CookieYes → Dashboard.
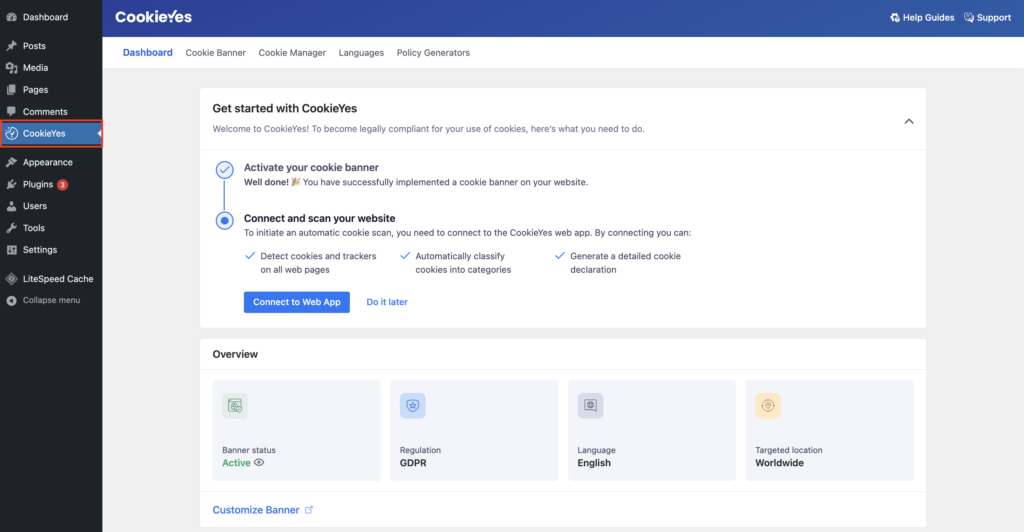
Step 2: Connect to the CookieYes Web App
- On the CookieYes Dashboard page, click one of the buttons labeled Connect to a new account OR Connect to an existing account if you have already signed up.
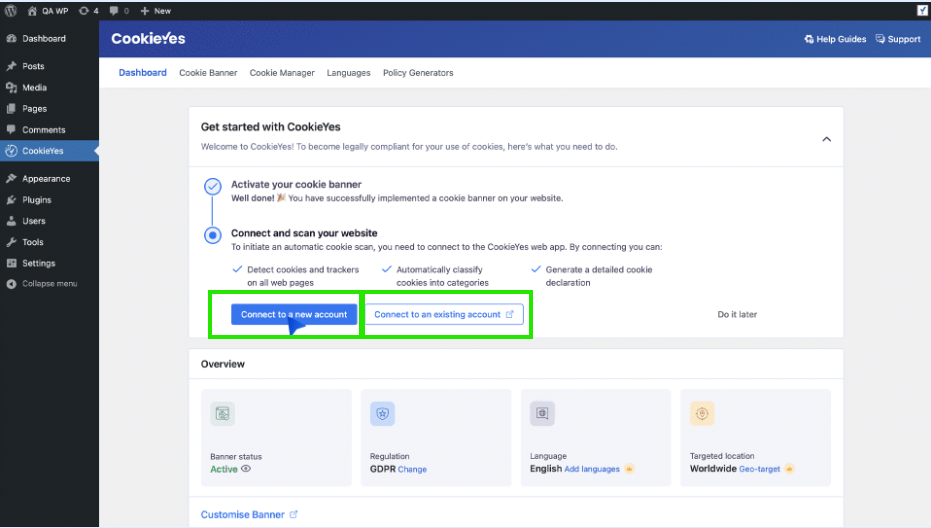
Step 3: Choose How to Connect
Option A if you have not signed up with CookieYes.com yet, Option B if you have an account already.
Option A – Create a New Account
- Select Create a new account and connect.
- Choose the Free plan (perfect for most sites).
- Click Connect for free.
- Enter your email and create a password.
- Click Sign Up & Connect to CookieYes.
Option B – Connect an Existing CookieYes Account
- Click Connect Your Existing Account.
- Enter your CookieYes email and password.
- Click Log In & Connect to CookieYes.
Step 4: Settings Migration
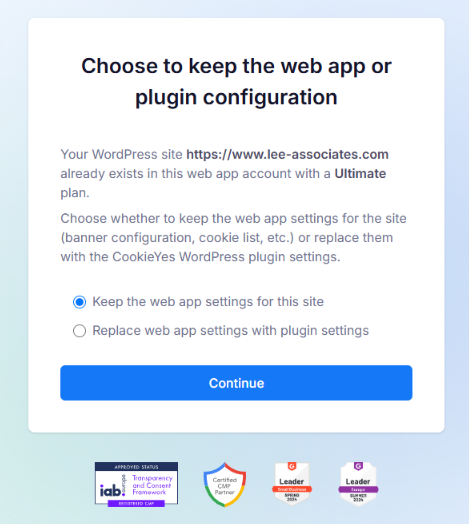
Option A – “Keep the web app settings for this site”
Keeps the settings on CookieYes.com as is. Keeps it set to the defaults if you haven’t configured anything yet. Choose this to start fresh on CookieYes.com if you haven’t edited the settings yet.
Option B – “Replace web app settings with plugin settings”
Changes the settings on cookieyes.com to match the settings you had set the plugin on the site. Choose this if you want to keep the settings you had set on the legacy plugin.